by Tom Nelson
It seems every version of Mac operating system that you install may have a few issues that pop up. Now, we’re not saying you can expect to experience all or even any of the issues we outline here. In fact, the vast majority of users upgrading to macOS Sierra won’t have these problems.
But if you do experience an issue after upgrading, it’s probably going to be one of the issues we mention here. Not to worry; we’ll show you how to resolve it.
Screen shot © Coyote Moon, Inc.
macOS Sierra Freezes During Install
There are two common freezing issues; one can occur during the install process, the other when your Mac reboots after the install is complete.
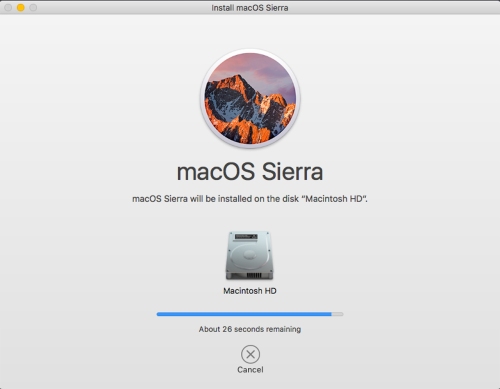
Freezes After Restart: Let’s start with the easier of the two issues to fix: when your Mac seems to stall during the final reboot of the installation. At this point, you’ve selected the target drive for the Sierra install, agreed to the licensing, and your Mac was displaying a progress bar with an estimate for time remaining.
The screen goes black, and your Mac reboots. So far, so good. The next step is for your Mac to finish the restart and display the Setup Assistant, for finishing up any needed details before the login or desktop is displayed. Instead, your Mac seems to be frozen on the dark screen, or perhaps with a wait icon spinning away.
The problem is that your Mac failed to restart correctly, but because all the install guides warn you that the first restart can take a long time, you don’t know how long to wait. To be on the safe side, a half hour is more than long enough, and if your Mac hasn’t brought up the Setup Assistant by then, you can give your Mac a figurative kick in the pants.
Force your Mac to shut down by pressing and holding the power switch. After your Mac shuts off, you can go ahead and power it up again. Your Mac should power on and display the Setup Assistant, letting you finish the installation of macOS Sierra.